12 Affordable Smart Home Upgrades You Can DIY in 2026

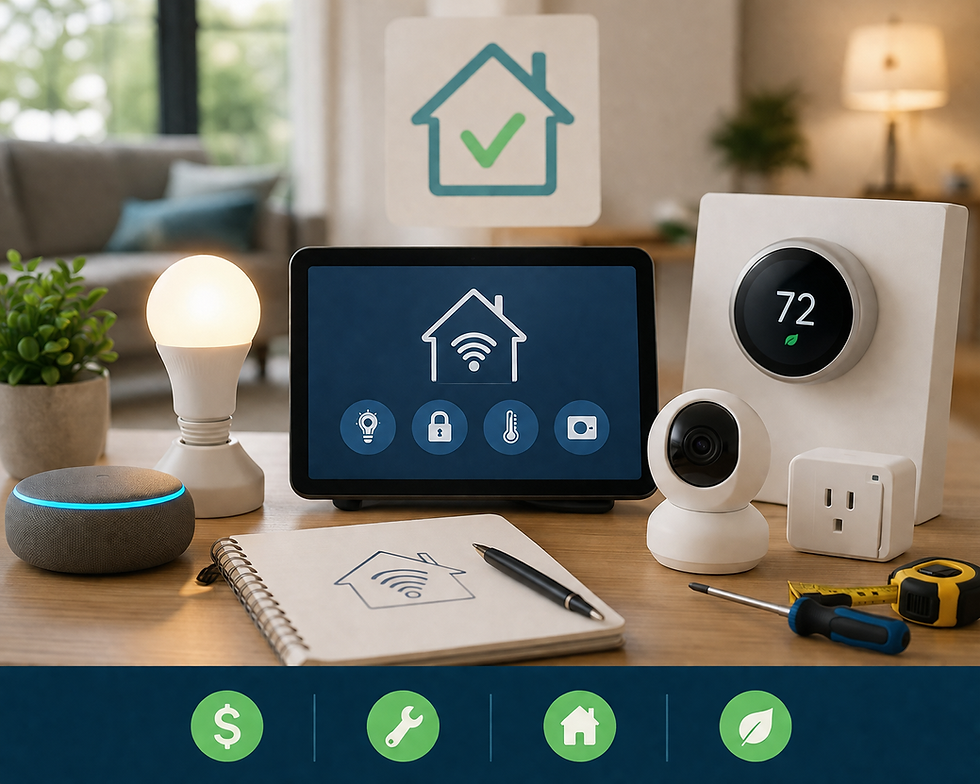
Smart homes sound expensive, but they don't have to be. You don't need a full renovation or a professional installer to make your house smarter. Most affordable smart home upgrades cost less than a dinner out, and you can install them yourself in under an hour.
This article walks you through 12 budget-friendly projects anyone can complete. Each one uses basic tools, plain instructions, and devices that don't require rewiring or an electrician. Whether you own your home or rent, you'll find upgrades here that fit your budget and skill level.
Let's get started with what actually makes a smart home upgrade "affordable" in the first place.
What Makes a Smart Home Upgrade Affordable?
An affordable smart home upgrade costs little upfront, needs no professional installation, and doesn't lock you into ongoing fees. Price alone doesn't tell the whole story.
A $20 device that requires a $10 monthly subscription isn't cheap in the long run. A $60 device that works for years without extra costs might be the better deal. Before buying anything, weigh these six factors:
Device cost. The sticker price is only the starting point.
Installation requirements. Some devices need wiring knowledge. Others just need a screwdriver.
Subscription fees. Cloud storage, advanced features, and monitoring often cost extra each month.
Compatibility. A device that doesn't work with your existing setup adds hidden cost and hassle.
Energy savings. Some upgrades pay for themselves over time.
Long-term value. Cheap devices that break in a year cost more than sturdy ones that last five.
Keep these factors in mind as you read through the projects below. The cheapest device on the shelf isn't always the cheapest option overall.
12 Affordable DIY Smart Home Upgrades
You don't need to tackle all 12 projects at once. Pick one that solves a problem you actually have, get comfortable with it, then move to the next. Here's the full line-up, from the simplest starting points to more advanced additions.
1. Install Smart Light Bulbs
Smart light bulbs are one of the easiest smart home upgrades for beginners. You screw them into an existing fixture, connect them to an app, and you're done. No wiring, no switches to replace, no electrician required.
Here's how to get started:
Choose a bulb that matches your fixture's socket size and wattage.
Download the manufacturer's app and create an account.
Screw in the bulb and turn the fixture on.
Follow the app's pairing instructions, usually a tap or a scan of a QR code.
Set a name for the bulb based on its room, like "Living Room Lamp."
Once connected, you can schedule lights to turn on at sunset, dim them for movie night, or control them with your voice through a smart speaker. You can also turn lights on remotely while traveling, which makes a home look occupied.
Best rooms to start with: bedrooms, living rooms, and entryways. These are spaces where scheduling and voice control make the biggest daily difference.
Expert tip: Start with just one or two bulbs in the room you use most. This lets you test the app and automation features before committing to a whole-house upgrade.
2. Add Smart Plugs to Ordinary Appliances
A smart plug turns any regular appliance into a connected device. Plug a coffee maker, lamp, or fan into a smart plug, and suddenly you can schedule it, control it remotely, or monitor how much power it uses.
This is one of the most affordable home automation projects because a single smart plug typically costs less than a fast-food meal, and it works with appliances you already own.
Practical ways to use smart plugs:
Schedule a coffee maker to start brewing before your alarm goes off.
Turn off a space heater automatically after a set number of hours.
Set holiday lights to turn on and off without a manual timer.
Monitor which appliances draw the most electricity, so you know where to cut back.
Smart plugs work well for renters too, since there's nothing to install permanently. Just plug it in, and take it with you when you move.
3. Install a Smart Thermostat
A smart thermostat learns your schedule and adjusts heating and cooling automatically. Heating and cooling account for almost half of the average American household's energy bill, according to the EPA's ENERGY STAR program. ENERGY STAR reports that certified smart thermostats save homeowners approximately 8% on heating and cooling costs, or about $50 per year on average, though your actual savings depend on your climate, habits, and HVAC system.
Before you buy one, check compatibility:
Confirm your HVAC system uses compatible wiring (most modern systems do).
Check whether your system has a C-wire, which many smart thermostats need for power.
Look up your specific thermostat model against your HVAC brand on the manufacturer's site.
Installation steps:
Turn off power to your HVAC system at the breaker.
Remove your old thermostat and take a photo of the wiring.
Label each wire according to the terminal it came from.
Mount the new thermostat's baseplate and connect the matching wires.
Restore power and follow the app setup instructions.
Most homeowners can do this in 30 to 45 minutes. If your system lacks a C-wire, has unusual wiring, or is a high-voltage system, calling a professional is the safer choice. Miswiring an HVAC system can damage the equipment.
4. Set Up a Smart Doorbell
A smart doorbell replaces your existing doorbell with one that streams live video, sends motion alerts, and lets you talk to visitors from your phone. It's one of the most popular DIY smart home security upgrades because it directly addresses a common worry: knowing who's at the door.
Wired versus wireless is the main decision point:
Feature | Wired Smart Doorbell | Wireless Smart Doorbell |
Power Source | Existing doorbell wiring | Rechargeable battery |
Installation | Slightly more involved | Very easy, no wiring |
Maintenance | Minimal | Requires periodic recharging |
Best For | Homes with existing doorbell wiring | Renters or homes without wiring |
Wireless models are the easier starting point for most beginners. You mount the doorbell with screws or adhesive, connect it to Wi-Fi, and you're ready to receive alerts for motion and rings. Wired models provide continuous power but require connecting to your home's existing low-voltage wiring.
5. Add Smart Motion Sensors
Motion sensors detect movement and can trigger lights, alerts, or both. They're inexpensive, battery-powered, and stick or mount almost anywhere.
Good placement locations include:
Hallways, so lights turn on automatically when someone walks through at night.
Entryways, to get an alert whenever someone approaches your door.
Garages, where automated lighting helps with safety and convenience.
Pair a motion sensor with smart bulbs or plugs, and you can set lights to turn on automatically whenever the sensor detects movement. This is especially useful for stairways and outdoor paths where fumbling for a switch is inconvenient or unsafe.
6. Upgrade to Smart Door Locks
Smart door locks let you unlock your door with a code, an app, or a fingerprint instead of a physical key. Many models also let you assign temporary codes for guests, dog walkers, or cleaners, and revoke access whenever you want.
Key features to look for:
Keyless entry using a code, app, or key fob.
Temporary access codes that expire automatically.
Remote locking, so you can check or lock your door from anywhere.
Battery life, since most models run on standard batteries for months.
Before buying, confirm the lock fits your existing door's bore hole size and deadbolt type. Many smart locks are designed as retrofit kits that reuse your existing exterior hardware, which keeps installation simple. Renters should check their lease and consider models that let you reinstall the original lock when you move out.
7. Create a Smart Home Hub
A smart home hub is the central point that connects your various devices so they can work together. Instead of opening five different apps to control five different devices, a hub lets you manage everything from one place.
This is why compatibility matters: not every device works with every hub. Before buying a hub, check which ecosystem your existing or planned devices support. The three most common ecosystems are Amazon Alexa, Google Home, and Apple Home. Many newer devices also support the Matter standard, which is designed to work across ecosystems.
How to choose a hub:
List every smart device you already own or plan to buy.
Check each device's compatibility with major hub ecosystems.
Pick the hub that supports the most of your current and future devices.
Confirm the hub supports voice control if that matters to you.
Starting with one ecosystem from the beginning saves you from having to replace devices later.
8. Add Smart Window or Door Sensors
Window and door sensors are small two-part devices that detect when a window or door opens. They're some of the easiest and cheapest home security devices to install, since most use adhesive backing instead of screws.
Common uses include:
Getting an alert if a door or window opens while you're away.
Triggering lights to turn on when a specific door opens.
Confirming a window is closed before you leave the house.
Setting up automation, like turning off the AC if a door stays open too long.
Installation usually takes less than five minutes per sensor. Peel, stick, and pair with the app.
9. Install Smart Smoke and Carbon Monoxide Detectors
Safety devices are not the place to cut corners on quality, even on a budget. Smart smoke and carbon monoxide detectors send mobile alerts the moment they detect a problem, even if you're not home to hear the alarm.
Key benefits include:
Mobile alerts that reach your phone no matter where you are.
Battery monitoring, so you know before a detector dies rather than after.
Early warnings, which matter most in the middle of the night.
Because these devices protect your life and property, prioritize reliability over price. Look for units that meet recognized safety certification standards, and check installation guidance from your local fire department or a consumer safety organization before mounting one.
10. Use Smart Curtains or Blinds
Smart curtains and blinds automate something most people never think to automate: natural light. Motorized tracks or clip-on motors let you schedule your blinds to open and close, control them remotely, or trigger them with sunrise and sunset.
Their benefits include:
Scheduling blinds to open in the morning and close at night automatically.
Light control for rooms that get too bright or too dark at certain hours.
Privacy without needing to walk over and adjust them manually.
Energy efficiency, since closing blinds during peak sun hours can reduce cooling costs in summer.
Clip-on motor kits are the most budget-friendly option, since they attach to blinds you already own instead of requiring a full replacement.
11. Set Up Smart Energy Monitoring
Smart energy monitors track how much electricity your home or specific appliances use. Some plug directly into an outlet, while others attach near your breaker panel for whole-home tracking.
Here's what they help you do:
Track electricity use in real time through an app.
Identify which appliances waste the most energy.
Monitor high-drain devices like space heaters or old refrigerators.
Reduce unnecessary consumption by spotting patterns, like devices left running overnight.
Energy monitors won't lower your bill by themselves, but the visibility they provide often leads to real behavior changes, like unplugging idle electronics or replacing an inefficient appliance.
12. Create Simple Automation Routines
Once you have a few smart devices installed, automation routines tie them together. A routine is a set of actions that happen automatically, based on a trigger like time of day or a sensor event.
Here are simple beginner routines to try:
Sunset routine: lights turn on automatically as it gets dark outside.
Goodnight routine: lights turn off, the thermostat lowers, and doors lock with one command.
Morning routine: blinds open, lights turn on gradually, and the thermostat adjusts for the day.
Motion-triggered lighting: hallway or garage lights turn on only when someone is present.
Most smart home apps include a routine builder with a simple drag-and-drop interface. Start with one routine, confirm it works reliably, then add more as you get comfortable.
Quick Summary: The 12 Upgrades at a Glance
Upgrade | Typical Cost Range | Skill Level |
Smart light bulbs | Low | Beginner |
Smart Plugs | Very Low | Beginner |
Smart Thermostat | Moderate | Beginner to Intermediate |
Smart Doorbell | Moderate | Beginner to Intermediate |
Motion Sensors | Low | Beginner |
Smart Door Locks | Moderate | Intermediate |
Smart Home Hub | Low to Moderate | Beginner |
Window and Door Sensors | Very Low | Beginner |
Smoke and CO Detectors | Moderate | Beginner to Intermediate |
Smart Curtains or Blinds | Moderate | Beginner |
Energy Monitoring | Low to Moderate | Beginner |
Automation Routines | Free (Using existing devices) | beginner |
How to Choose the Best Smart Home Upgrades for Your Budget
The best smart home upgrades on a budget start with a problem, not a product. Buying gadgets because they look interesting is how people end up with devices they never use.
Follow this approach instead:
Start with a specific problem. Do you forget to turn off lights? Worry about package theft? Want lower energy bills? Let the problem guide the purchase.
Set a project budget. Decide what you're willing to spend before you start browsing, and stick to it.
Check device compatibility. Confirm the device works with your phone's operating system and any hub you plan to use.
Consider installation requirements. Be honest about your comfort level with tools and wiring.
Look for long-term value. A slightly pricier device with a strong track record often costs less over several years than a cheap one that needs replacing.
Avoid unnecessary subscriptions. Many devices work fully without a paid plan. Read the fine print before assuming you need one.
Smart Home Upgrade Mistakes to Avoid
Even simple projects go wrong when a few common mistakes creep in. Watch out for these:
Buying incompatible devices. Always check ecosystem compatibility before purchasing, not after.
Ignoring Wi-Fi coverage. A device in a weak signal area will disconnect constantly and frustrate you.
Choosing devices based only on price. The cheapest option sometimes lacks basic security features or reliable support.
Overlooking privacy settings. Review what data a device collects and adjust settings the first time you set it up.
Forgetting subscription costs. Some devices are cheap upfront but expensive over a year of monthly fees.
Installing too many devices at once. This makes it hard to troubleshoot if something doesn't work.
Failing to update device software. Outdated firmware is one of the most common security weaknesses in connected devices. Organizations like the Cybersecurity and Infrastructure Security Agency recommend keeping smart devices updated and changing default passwords right away.
How to Build a Smart Home One Upgrade at a Time
Trying to do everything at once is overwhelming and expensive. A staged approach works better for almost everyone.
Stage 1: Start Small. Begin with smart bulbs and smart plugs. These are the cheapest, easiest devices to install, and they let you get comfortable with an app-based ecosystem before spending more.
Stage 2: Improve Security. Add a smart doorbell, motion sensors, and smart locks. These upgrades address safety and peace of mind, which tend to matter most to new smart home owners.
Stage 3: Improve Comfort. Install a smart thermostat, add smart blinds, and set up automation routines. This stage focuses on daily convenience and comfort.
Stage 4: Improve Efficiency. Round things out with energy monitoring and refined automated schedules. By this stage, you'll have enough devices connected to see real patterns in your energy use.
Moving through these stages over weeks or months, rather than all at once, keeps costs manageable and gives you time to learn each device properly.
Final Checklist for Affordable Smart Home Upgrades
Use this checklist before starting any new project:
Choose one problem to solve.
Set a realistic budget.
Check compatibility with your phone and any existing hub.
Confirm installation requirements match your comfort level.
Review privacy settings as soon as you set up the device.
Check for subscription fees before buying.
Install one device at a time.
Test each device fully before adding the next one.
Frequently Asked Questions
What is the cheapest way to make your home smarter?
Smart plugs and smart bulbs are the cheapest way to make your home smarter. Both cost very little, require no wiring, and install in minutes. They let you add scheduling, remote control, and voice control to appliances and lights you already own.
What smart home upgrades can beginners install themselves?
Beginners can easily install smart bulbs, smart plugs, motion sensors, window and door sensors, and many wireless smart doorbells. These devices typically use adhesive mounts, batteries, or standard sockets, so no electrical wiring knowledge is required.
Can I create a smart home without rewiring?
Yes. Many wireless smart devices, including bulbs, plugs, sensors, locks, and battery-powered doorbells, install without touching your home's existing wiring. Only certain upgrades, like wired doorbells or some thermostats, may involve connecting to existing low-voltage wires.
Are smart home upgrades worth the money?
For most households, yes. Smart home upgrades add convenience, improve security awareness, and can reduce energy waste over time. A smart thermostat alone can save around 8% on heating and cooling costs, according to ENERGY STAR. The value depends on choosing devices that solve real problems rather than buying gadgets for their own sake.
What should I buy first for a smart home?
Start with one simple device that solves a specific problem you already have. If you want convenience, start with smart bulbs. If you want security, start with a doorbell or motion sensor. Buying based on a real need leads to more consistent use than buying at random.
Can renters install smart home devices?
Yes. Many smart home devices are designed for renters, including plug-in smart plugs, battery-powered sensors, adhesive-mounted doorbells, and retrofit door locks that let you reinstall the original hardware later. Always check your lease for any restrictions before drilling or making permanent changes.
Conclusion
Affordable smart home upgrades don't require a big budget or advanced technical skill. From smart bulbs and plugs to thermostats, locks, and sensors, most of these 12 projects cost little and install in under an hour. The key is starting with a real problem, checking compatibility, and building your smart home one upgrade at a time.
You don't need all 12 projects to feel the benefit. Pick the one that solves your biggest daily annoyance, install it this weekend, and build from there. A smarter, more convenient home is closer than you think.

Comments